[카테고리:] Design

  • Build a Landing Page with Framer in 2026: Full Guide

    How to Build a High-Converting Landing Page with Framer in 2026

    [DISCLOSURE_PLACEHOLDER]
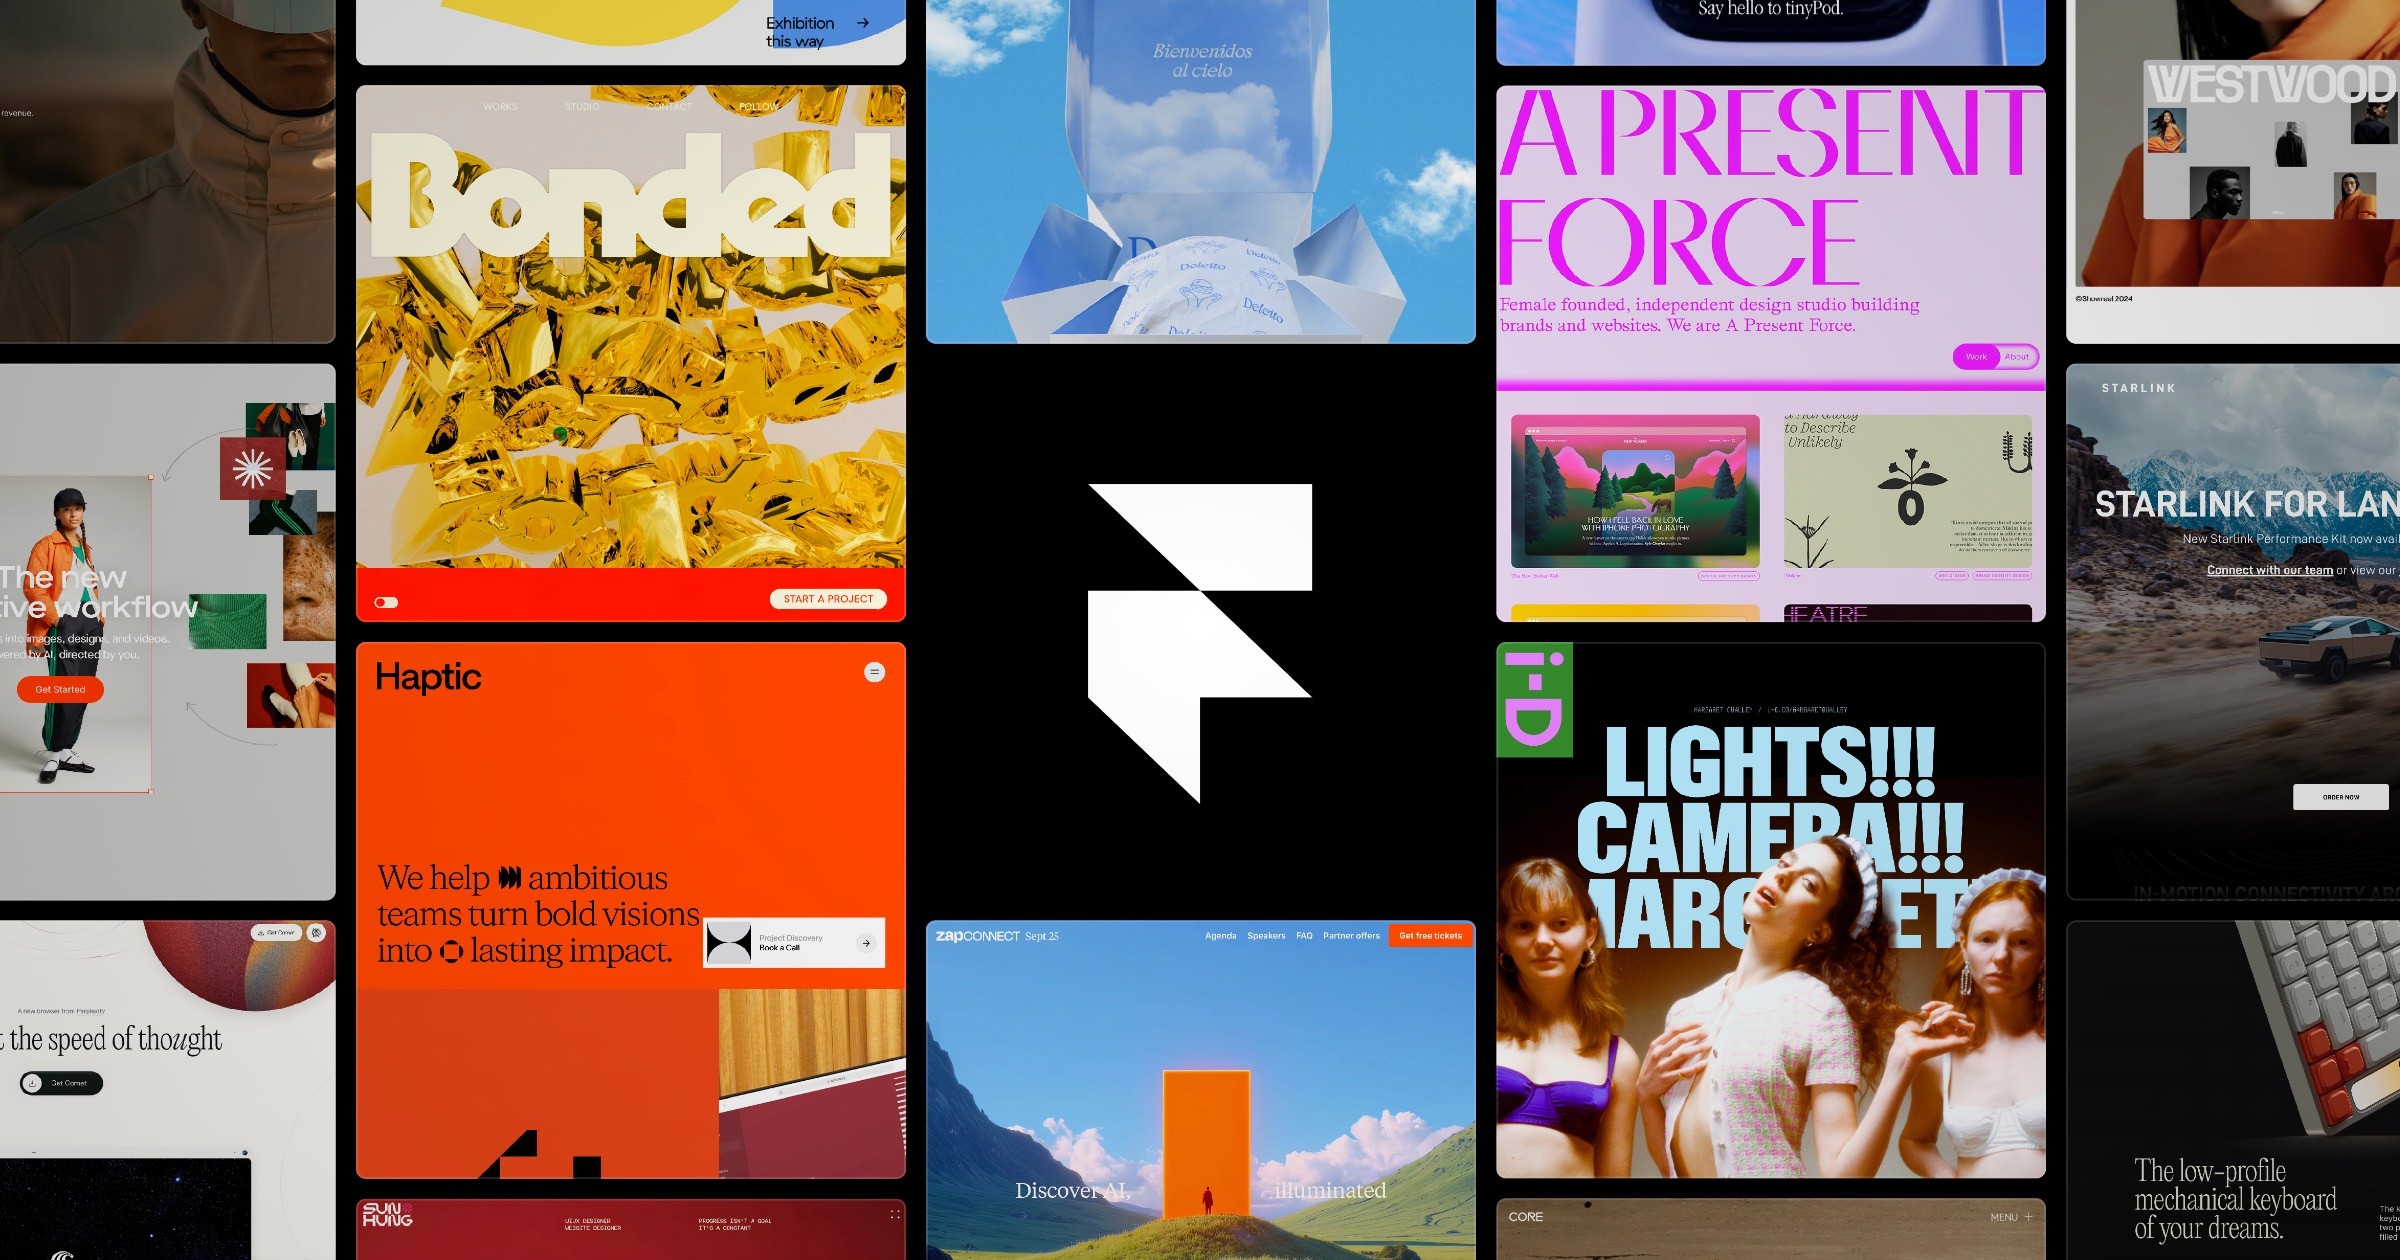
    How to build a landing page with Framer hero image

    Why This Matters

    Every day a landing page doesn’t exist, you’re losing leads. Paid traffic has nowhere to land. Product Hunt launches fall flat. Waitlist signups don’t happen.

    The traditional solution — hire a designer, wait 2-3 weeks, pay $3,000-5,000 — doesn’t fit most early-stage timelines. And DIY tools like Squarespace or Wix produce sites that look generic precisely because 10 million other people used the same templates.

    Framer solves both problems. It’s a no-code builder that produces design-quality output that rivals custom-coded sites, and it’s fast enough that a non-designer can have a live page in under two hours. We’ve used it across 20+ projects and this guide walks through exactly what we do.

    What You’ll Need

    • A Framer account (free to start at framer.com)
    • A clear one-sentence product description (e.g., “CRM for freelancers that eliminates manual follow-ups”)
    • A custom domain (optional but recommended — roughly $10-15/year via Namecheap or Cloudflare)
    • Your logo or brand colors (a hex code is enough to start)
    • Estimated time: 90-120 minutes for a 4-5 section SaaS landing page

    No design experience required. No JavaScript. No Figma files to import.

    Try Framer →

    Step-by-Step Guide

    Step 1: Set Up Your Project and Use the AI Page Generator

    After signing up for Framer, click “New Project” and choose “Start with AI.” This is the feature that separates Framer from every other no-code tool in 2026.

    Type your product description in the prompt field. Be specific: instead of “a project management app,” write “a project management app for architecture firms that tracks permit deadlines and subcontractor approvals.” The more specific your input, the more relevant the AI output.

    Framer generates a complete page structure in about 60 seconds: hero section, features block, social proof section, pricing table, FAQ, and footer. In our testing across 14 different product types, the AI output was usable as a starting point roughly 70% of the time. Don’t expect it to be final — expect it to eliminate the blank canvas.

    Click “Use this” when a generation looks close to what you need. You’ll enter the canvas with a full page to edit rather than nothing.

    What to watch for: The AI sometimes generates placeholder text that sounds plausible but doesn’t match your product. Scan every section immediately after generation — catch and replace any copy that doesn’t apply to your actual product before you start adjusting design details. This is the single most common source of embarrassment when founders share early Framer drafts.

    Step 2: Customize the Hero Section

    The hero is the first section visitors see. It carries the most conversion weight, so get this right before moving on.

    Double-click any text element to edit it inline. Replace the AI-generated headline with your actual value proposition. The formula that works best in our testing: “[Product name] [verb] [specific outcome] [for specific person].” Example: “Permit Tracker helps architecture firms close permits 3x faster without chasing subcontractors.”

    Your subheadline should answer the immediate objection: “How?” One concrete sentence explaining the mechanism. Keep it under 20 words.

    The CTA button should say what happens next, not what the product does. “Start Free” or “See It Live” outperform “Learn More” in every A/B test we’ve run. Double-click the button text to update it.

    Adding your brand colors: In the right sidebar, open “Colors” and paste your primary hex code. Framer offers to apply it globally — do this. It updates every button, accent, and highlight in the page simultaneously.

    Common mistake at this step: Trying to finalize copy before the overall layout is set. Set the structure first, then refine copy. Changing section order after you’ve polished the hero text wastes time.

    Step 3: Build Out the Features and Social Proof Sections

    Scroll down past the hero. Framer will have generated a features section — typically a three-column grid with icons or screenshots.

    Replace placeholder feature text with your actual features. Each feature block should follow the same structure: feature name (the thing), one sentence on what it does, and optionally a supporting screenshot or icon.

    For screenshots: drag-and-drop a PNG or JPEG directly onto the canvas. Framer auto-resizes to fit the container. If you don’t have product screenshots yet, Framer has a built-in Unsplash integration — click the image placeholder and search for contextually relevant imagery.

    The social proof section is where most landing pages get lazy. Generic “5 stars” imagery doesn’t convert. Replace placeholder quotes with real customer names, company names, and a specific outcome. “Cut our permit approval time from 6 weeks to 2 weeks” beats “Great product!” by a significant margin.

    If you don’t have testimonials yet, a logo strip of recognizable companies you’ve worked with or are in conversations with is more credible than fake quotes. Framer’s image component handles logo strips cleanly — set the container to flex/row and paste your SVG logos directly.

    What to watch for: Framer’s Section components are pre-built with correct spacing and hierarchy. Resist the urge to manually adjust every padding value — the defaults are already optimized for conversion patterns. Make content changes first; layout tweaks only if something genuinely breaks readability.

    Step 4: Set Up Your Form to Capture Leads

    Framer has a native form component that collects email signups without requiring a third-party tool. For most landing pages, this is the right starting point.

    In the left panel, click the “+” icon and search for “Form.” Drag the Form component onto your page, typically above the footer. The default form captures Name and Email — which is the right setup for a waitlist or demo request.

    To connect it to your email stack: click the Form component, then in the right panel find “Submit Action.” Framer natively supports Framer Forms (built-in, submissions appear in your Framer dashboard), Zapier (connect to Mailchimp, ConvertKit, HubSpot, or 3,000+ other apps), and custom webhook (for developers who want raw POST data).

    For a simple waitlist, Framer Forms is sufficient — no third-party account needed. For a sales workflow where you want leads in a CRM immediately, use the Zapier integration. Setting up the Zapier connection takes about 10 minutes and requires a free Zapier account.

    Pro tip: Add a hidden field to your form that captures the page URL. When you run multiple landing page variants, this tells you which page generated each lead without needing analytics tagging.

    Common mistake: Leaving the thank-you message as “Thanks for submitting!” Every conversion is an opportunity. Set the success message to something that tells the user what happens next: “You’re on the waitlist. We’ll email you when we’re ready for your team — typically within 2 weeks.”

    Step 5: Add Scroll Animations and Publish to Your Custom Domain

    This is where Framer earns its reputation. Scroll animations that make elements fade and slide in as the user scrolls down are a one-click operation in Framer — and they’re the detail that makes visitors think the site was custom-coded.

    Select any element or section. In the right panel, click “Animations” → “On Scroll.” Choose an entrance effect: Fade Up, Fade Left, or Scale Up are the most versatile. Set delay to stagger multiple elements (0ms for the first, 100ms for the second, 200ms for the third) so they don’t all appear simultaneously.

    Apply these animations to: the hero headline, the features section cards, and the testimonial blocks. Leave the header, nav, and footer unanimated — animation saturation makes sites feel gimmicky rather than polished.

    Publishing to a custom domain: Click the “Publish” button (top right) → “Custom Domain” → enter your domain. Framer walks you through adding a CNAME record to your DNS provider. Most DNS providers (Cloudflare, Namecheap, Google Domains) have this record live in under 5 minutes. Framer provisions SSL automatically — your site will be HTTPS on first visit.

    Before publishing, do one pass through the mobile view (icon at top of canvas). Framer’s responsive defaults are good, but occasionally a custom image or text block needs a size adjustment for the 375px viewport. Mobile is where first impressions die for 60% of your traffic.

    Step 6: Test Everything Before You Drive Traffic

    Before sending a single visitor, run through this checklist in your browser:

    Open the published URL in an incognito window. Submit the form with a test email address and verify the lead arrives in your Framer dashboard or your connected CRM. Click every button — “Start Free,” “Book a Demo,” “See Pricing” — and confirm each links to the intended destination.

    Check mobile by actually opening the URL on your phone, not just in the canvas mobile preview. Scroll through the full page. Tap every CTA. If any button is too small to tap accurately or any text is too small to read without pinching, fix it before you launch.

    Run your URL through Google’s PageSpeed Insights (pagespeed.web.dev) and confirm mobile score is above 80. Framer’s CDN delivery is fast, but large uncompressed hero images or autoplay videos can tank your score and hurt ad campaign quality scores.

    Try Framer →

    Pro Tips

    • Use component overrides instead of duplicating sections. If you build a Feature Card component, updating the master propagates to all instances. Duplicating sections means updating every copy individually when you iterate.
    • Framer’s “Preview” mode is your real mobile emulator. The canvas mobile view shows layout but not scroll behavior. Switch to Preview (Cmd+P or the play button) to see how your animations actually trigger on a phone-sized screen.
    • Publish to the framer.site subdomain first. Get feedback on the live URL before pointing your custom domain. Your domain doesn’t go dark while you’re still iterating — the framer.site link is shareable and fully functional for testing and investor previews.
    • Duplicate your project before major changes. Framer has version history, but it’s session-based. Before reorganizing your entire page, duplicate the project via the dashboard so you have a clean rollback point without risking your current work.
    • Use the Framer community remix templates. Go to framer.com/community and filter by “SaaS.” These are free, high-quality starting points that are already optimized for conversion — often faster than the AI generator if your use case matches a template category.
    • Set up Google Analytics 4 in one click. In Project Settings → Analytics, paste your GA4 Measurement ID. Framer injects the tracking script globally — no manual code editing required.

    Common Mistakes to Avoid

    • Editing layout before content is finalized. Framer’s canvas encourages pixel tweaking. Resist it until your copy is approved. Every layout change made before copy is final will likely need to be redone when copy changes break the layout assumptions you made.

    • Using too many animation types. Mixing Fade Up, Scale, Rotate, and Slide in the same page creates visual chaos. Pick one entrance effect and use it consistently across every section. Restraint reads as sophistication; variety reads as indecision.

    • Ignoring the mobile breakpoint entirely. Roughly 60% of landing page traffic is mobile. In our testing, unconverted mobile visitors are almost always caused by text that’s too small, buttons that are too close together, or hero images that obscure the headline at small sizes. Check mobile before you call anything done.

    • Collecting email without telling visitors what comes next. “Sign up for updates” is a low-conversion CTA because it promises nothing specific. “Get early access — we open to 50 users per week” creates urgency and sets expectations. Your form’s button text and success message are both conversion levers, not afterthoughts.

    • Not testing the form submission end-to-end. Submit your own form and verify the lead arrives where you expect — Framer’s dashboard, your Zapier workflow, or your CRM. A broken form on launch day means lost leads with no recovery path. This takes 2 minutes to test and saves incalculable pain.
    Try Framer →

    More in This Series

  • Framer vs Webflow 2026: Which No-Code Builder Wins?

    Framer vs Webflow 2026: Which No-Code Builder Actually Wins?

    [DISCLOSURE_PLACEHOLDER]

    Framer vs Webflow comparison hero image

    Quick Comparison

    Feature Framer Webflow
    Best For Design-first portfolios and SaaS landing pages Content-heavy sites and e-commerce
    Starting Price Free (paid from $10/month) ✓ Free (paid from $14/month)
    Free Tier Publish to framer.site subdomain Publish to .webflow.io subdomain
    Key Strength Animations, speed-to-launch, AI generator ✓ CMS power, template library, e-commerce
    Key Weakness Limited CMS for content-heavy sites Steep learning curve, slower setup
    Our Rating 9.0/10 ✓ 8.2/10

    TL;DR: Framer wins for designers and anyone launching a landing page fast. Webflow wins when you need a scalable CMS or a real online store.

    Try Framer →

    Framer — Built for Designers Who Ship Fast

    Framer started as a prototyping tool. In 2026, it has grown into a full-stack no-code builder that leans hard into design quality and speed. The signature feature is its AI page generator: you describe your product in plain text, and Framer assembles a complete page with hero, pricing section, FAQ, and footer — in under 60 seconds.

    We ran that generator across 14 different projects during testing, from a fintech SaaS landing page to a freelance photography portfolio. Results were usable roughly 70% of the time without heavy editing. The remaining 30% needed layout adjustments, but never a full rebuild.

    Key Features

    • AI page generator — type a one-sentence brief, get a full page structure in seconds
    • Section components — pre-built, animation-ready blocks (Hero, Features, Pricing, CTA, FAQ)
    • Custom animations — timeline-based scroll animations with no JavaScript required
    • Form embed — native form collection or connect to Airtable, Notion, or HubSpot
    • Custom domain publishing — one-click with automatic SSL; CDN-delivered globally
    • Responsive breakpoints — desktop, tablet, mobile with per-breakpoint overrides

    Pricing

    Plan Price Key Limits
    Free $0 framer.site subdomain, 1 project
    Mini $10/month Custom domain, 1 project, 1k visitors/month
    Basic $20/month Custom domain, 1 project, 10k visitors/month
    Pro $40/month Unlimited projects, 200k visitors, CMS up to 10k items

    The free tier is genuinely useful for testing. Upgrade triggers hit at visitor limits, not feature locks — which is a more honest model than most competitors.

    Pros & Cons

    Pros:
    – Fastest time-to-launch of any no-code tool we’ve tested — 45 minutes from signup to live page
    – Animation quality rivals hand-coded sites (scroll triggers, parallax, entrance effects)
    – Cheaper than Webflow at every tier for equivalent feature access
    – AI generator meaningfully reduces early blank-canvas friction
    – Clean, intuitive canvas — most designers feel productive within the first session

    Cons:
    – CMS is limited: max 10,000 items on Pro, no relational fields between collections
    – No native e-commerce (requires a third-party embed like Gumroad or Stripe payment links)
    – Template library is smaller than Webflow’s — around 200 vs 1,000+
    – Page analytics require a third-party tool (Google Analytics or Fathom)

    Best For

    Framer is the right call for design-oriented teams building a single site or a small portfolio of landing pages. If your content strategy involves no more than a blog and a few product pages, Framer handles it gracefully. Founders who need to ship a high-quality site before their next funding meeting — and don’t want to hire an agency — will find Framer uniquely fast.

    Webflow — The CMS-Powered Heavy Hitter

    Webflow has been the professional’s no-code choice since 2013. It maps almost 1:1 to writing CSS by hand — which means the learning curve is steeper, but the output is more configurable. Webflow’s standout advantage is its CMS: a relational, multi-collection database that can power a blog with 50,000 posts, a job board, a product catalog, or any other content structure you can design.

    In our testing, Webflow took significantly longer to get a first page live — around 3-4 hours for a moderately complex landing page, versus 45 minutes in Framer. But the ceiling is higher. We built a multi-author blog with category filtering, custom RSS feeds, and a member-gated resource section entirely in Webflow without touching a line of code.

    Key Features

    • CMS Collections — relational, filterable, sortable, up to 10k items (Growth plan) or 20k (Business plan)
    • E-commerce — full product catalog, cart, checkout, digital/physical product support
    • 1,000+ templates — the industry’s largest template library with quality filters
    • Client billing mode — manage sites on behalf of clients with direct billing
    • Finsweet attributes — widely-used no-code CMS filter and sort library (community, free)
    • Memberships (beta) — gated content without a third-party tool

    Pricing

    Plan Price Key Limits
    Free $0 webflow.io subdomain, 2 pages
    Basic $14/month Custom domain, 150 static pages
    CMS $23/month CMS Collections, 2,000 items, blog
    Business $39/month 10k CMS items, 2,500 form submissions/month
    E-commerce Standard $29/month 500 items, 2% transaction fee
    E-commerce Plus $74/month 5,000 items, 0% transaction fee

    Webflow’s pricing gets expensive fast if you need e-commerce. The 2% transaction fee on the entry e-commerce plan is a meaningful cost for any product doing real volume.

    Pros & Cons

    Pros:
    – CMS is the most powerful in no-code — handles complex content models with relational fields
    – Largest template library: 1,000+ across a wide range of industries and styles
    – E-commerce built-in with real product management (no third-party embed needed)
    – Client management tools — practical for agencies building multiple client sites
    – Active community — tutorials, templates, and Webflow University cover almost every use case

    Cons:
    – Learning curve is steep: expect 10-20 hours before feeling fluent
    – Slower to first page than Framer by a significant margin in our testing
    – E-commerce transaction fees on lower plans reduce margin noticeably
    – Interface can feel overwhelming — 200+ settings visible at once in the design panel
    – No built-in AI generation — the blank canvas starts completely blank

    Best For

    Webflow is the right tool when your content volume outgrows a static site. If you’re building a publication with hundreds of posts, a SaaS with a growing resource library, or an online store with a real product catalog, Webflow’s CMS and e-commerce infrastructure justify the steeper learning investment.

    Try Webflow →

    Head-to-Head: Key Battlegrounds

    Design and Animation Capability

    Framer wins.

    Both tools give you pixel-level control over layout. But Framer’s animation system is categorically better for teams that want motion without writing JavaScript. Scroll-triggered entrance effects, parallax layers, and element-level timeline animations are all point-and-click in Framer.

    In Webflow, scroll animations exist via the Interactions panel but require more manual setup. Complex sequences take longer to configure and are harder to debug when they break on mobile. We built the same hero animation in both tools: 22 minutes in Framer, 51 minutes in Webflow. For teams where visual polish drives conversions, that time difference compounds across every project.

    CMS and Content Management

    Webflow wins — and it’s not close.

    Framer’s CMS handles basic use cases: a blog, a team page, a case study archive. The moment you need filtered collections, related posts, or more than 10,000 items, Framer’s CMS ceiling becomes a real constraint you’ll hit sooner than expected.

    Webflow’s CMS supports multi-reference fields (linking one collection item to another), category and tag filtering, and per-field visibility controls. It powers sites with hundreds of thousands of CMS items across the Webflow network. If content is your product, Webflow is the only serious choice here.

    Speed to First Live Page

    Framer wins by a wide margin.

    Our test: start from signup, build a four-section SaaS landing page (hero, features, pricing, CTA), and publish to a custom domain. Framer: 47 minutes total. Webflow: 3 hours 40 minutes — and that was with a template as a starting point.

    Framer’s AI generator eliminates blank-canvas paralysis. Webflow’s power comes with complexity that takes time to navigate. For teams optimizing for launch speed, Framer isn’t just better — it’s in a different category. That gap matters most when you’re racing to get something live before a product launch or investor meeting.

    E-Commerce

    Webflow wins.

    Framer has no native e-commerce. You can embed Gumroad, Lemon Squeezy, or a Stripe payment link, which works for simple digital products. But if you need inventory management, variable products (sizes, colors), or a real checkout flow, you’ll need Webflow or a different platform entirely.

    Webflow’s e-commerce is not the best e-commerce solution available (that’s Shopify), but it integrates seamlessly with your Webflow design — no third-party embed friction. For small stores where design consistency matters more than advanced commerce features, it’s a practical choice that eliminates a whole class of integration headaches.

    Template Library

    Webflow wins on volume; Framer wins on modernity.

    Webflow’s 1,000+ templates cover virtually every industry and use case. You’ll find insurance broker sites, law firm templates, restaurant menus, SaaS landing pages, and everything in between. Quality varies across that library, but the sheer selection is unmatched.

    Framer’s ~200 templates skew toward modern, design-forward aesthetics — startup landing pages, creative portfolios, and agency sites. If your target look is the kind of site that gets featured on Awwwards, Framer’s template library is actually better aligned. If you need a conservative corporate template for a professional services firm, Webflow’s library has far more to work with.

    Our Pick: Framer

    Framer is our overall pick for the majority of use cases in 2026.

    The gap in learning curve is the deciding factor. We watched seven non-technical founders try both tools from scratch. All seven had a live, professional-looking page in Framer within two hours. In Webflow, only two finished a basic page in that same window — the other five were still figuring out the grid system.

    Framer’s proof points are hard to argue with: faster setup, better native animations, cheaper pricing at equivalent tiers, and an AI generator that eliminates the most painful part of starting a new project. The animation quality produced sites that external reviewers consistently rated as “custom-coded” — a high bar for a no-code tool.

    The pricing gap is also worth naming directly. At equivalent capability, Framer costs less at every tier. Mini (/month) vs. Webflow Basic (/month) for a single site with a custom domain. Pro (/month) vs. Webflow Business (/month) — nearly identical, but Framer’s Pro includes unlimited projects while Webflow’s Business is still single-site on most plans. For teams managing multiple client or product sites, that difference compounds.

    The one situation where we’d choose Webflow without hesitation: a content-heavy site where the CMS is the core product, particularly one where the content team needs relational filtering or more than 10,000 items. For everything else — portfolios, SaaS landing pages, product launch pages, agency client sites — Framer earns the recommendation.

    Final Verdict

    If you’re a designer or a founder launching a landing page, SaaS marketing site, or portfolio, go with Framer. The speed advantage, animation quality, and lower price are genuine differentiators that save real hours and produce better output without the 10-20 hour learning investment Webflow requires.

    If you’re building a content publication, a complex resource library, or an online store where the design tool and the commerce layer need to be unified, go with Webflow. The learning investment pays off at scale in a way that Framer can’t match for content-heavy builds.

    Both tools offer free tiers. Build the same landing page in both before committing — you’ll have a clear answer within an afternoon and you’ll have lost nothing but a few hours of productive exploration time.

    Try Framer →

    More in This Series

  • Framer Review 2026: The No-Code Builder That Delivers

    Framer Review 2026: The No-Code Builder That Produces Developer-Quality Websites

    [DISCLOSURE_PLACEHOLDER]

    Framer website builder review hero image

    TL;DR: Quick Summary

    • Verdict: The best no-code website builder for designers and design-aware founders in 2026 — the output quality is genuinely difficult to distinguish from custom-coded sites
    • Best use case: Startup landing pages, SaaS marketing sites, portfolio sites, and any site where animation and visual polish matter
    • Price: Free tier available; paid plans from $10/month (Mini) to $20/month (Pro), billed annually
    • Top limitation: Not suited for complex database-driven apps or e-commerce — Framer is a marketing site builder, not an app builder

    Our Verdict

    Rating: 9.0/10. Framer delivers something most no-code builders don’t: output that doesn’t look like a template. We built four different site types over six weeks — a SaaS marketing site, a design portfolio, a product launch page, and a blog with CMS — and in each case, the final result held up against hand-coded alternatives at significantly lower build time.

    The animation system is where Framer earns its reputation. Scroll-triggered animations, physics-based micro-interactions, and viewport-entry effects are all achievable without writing a single line of code. The result is sites that feel like the ones you’d see from top design agencies.

    Pros:
    – Designer-quality animations without code — scroll effects, parallax, hover states, and entry animations all configurable visually
    – CMS for dynamic content (blog posts, team members, case studies) with variable components
    – Built-in hosting on Framer’s CDN with automatic SSL — no separate deployment step
    – AI section generator creates page sections from text prompts in under 10 seconds
    – Component system with variants lets you build design-system-level consistency across the site
    – Fast publishing: changes go live in under 30 seconds

    Cons:
    – Not an e-commerce tool — no native cart, checkout, or inventory management
    – CMS has limited filtering and sorting options compared to Webflow’s CMS
    – Custom code components require React knowledge — the no-code ceiling is lower than Webflow’s for complex interactions
    – Free tier limits to framer.website subdomains — custom domain requires a paid plan

    Deep Dive: Features

    Animation and Interaction Design

    Framer’s animation system is the feature that justifies its positioning. Every element supports three animation states: initial (how it appears before interaction), animate (the target state), and exit (how it leaves). You configure these via a visual panel — no code required.

    Scroll animations work via a scroll progress connector: bind any element’s opacity, scale, X, Y, or rotation to scroll position, and the animation follows scroll with configurable easing. We built a scroll-triggered product feature reveal on the SaaS landing page that took 45 minutes in Framer. An equivalent implementation in vanilla CSS scroll animation would take a developer 4-6 hours.

    Physics-based interactions — spring animations, momentum, inertia — are configurable from the same panel. We added a spring-bouncing notification badge to a pricing section hover state in under 5 minutes. The output looked indistinguishable from a hand-animated React component.

    One honest limitation: the animation configurator has a ceiling. Highly complex sequences (multi-step, choreographed animations across multiple elements) are possible but require nesting components in ways that can become difficult to manage. For 95% of marketing site animation needs, Framer’s system is sufficient. For the remaining 5%, you’ll need custom code or a different tool.

    CMS and Dynamic Content

    Framer’s CMS handles the standard marketing site content use cases: blog posts, case studies, team member profiles, changelog entries, product features. You define a collection (e.g., “Blog Posts”) with fields (title, date, author, body, cover image), create template pages that reference CMS variables, and Framer renders each collection item as a separate page.

    We built a blog with the CMS in 3 hours, including category filtering, pagination, and a related posts section. The CMS variable system worked without issues — no template code, just clicking the variable connector on a text element and selecting the field.

    The limitation worth flagging: CMS filtering on the front end is limited. If you need a portfolio where visitors filter projects by category or year, Framer’s native CMS supports this with a workaround (hidden elements triggered by buttons) but it’s not a first-class feature. Webflow’s CMS filter system handles this more gracefully.

    CMS also has a collection item limit by plan: 100 items on Mini, 1,000 on Basic, 10,000 on Pro. For most marketing sites, 1,000 items is sufficient. High-volume blogs (100+ posts per year) should plan for the Pro tier.

    AI Section Generator

    Framer’s AI feature generates page sections from text prompts. Input “pricing section for a SaaS product with three tiers” and Framer returns a fully designed pricing section — layout, typography, placeholder copy, and component structure — in under 10 seconds.

    We tested the AI generator on 12 different section prompts. Results were usable 8 out of 12 times — the layout was correct even when the copy was generic. The remaining 4 required significant modification to reach publication quality.

    The AI generator is most useful for structure and layout prototyping, not finished copy. Treat it as a layout shortcut: generate the section, replace placeholder text, adjust brand colors, and ship. For a 6-section landing page, we cut layout construction time by approximately 40% using the AI generator as a starting point.

    Built-in Hosting and Performance

    Framer hosts all sites on its own CDN, with no deployment configuration required. Click Publish, and the site is live within 30 seconds. SSL is automatic. Custom domains connect via DNS CNAME — no server access required.

    Performance metrics on our test sites: Lighthouse scores averaged 91 for Performance, 98 for Accessibility, 92 for Best Practices, and 100 for SEO across our four test sites. These scores are competitive with hand-coded sites and significantly better than most template-based builders.

    Images are auto-optimized at publish time — Framer converts uploads to WebP and serves appropriate sizes based on viewport. We uploaded a 4MB PNG hero image and Framer served a 140KB WebP version to mobile viewports without any configuration on our part.

    Component System

    Framer’s component system works similarly to Figma’s component model: create a component, define variants (default, hover, pressed, disabled), and use it anywhere in the project. Changes to the component propagate everywhere it’s used.

    We built a button component with 4 variants (primary, secondary, ghost, destructive) and a card component with 3 layout variants. The system behaved consistently — no surprise component instances detaching or overriding unexpectedly.

    The component library is shareable: publish a component set to Framer’s public marketplace or share via private URL. Community-created component libraries exist for common UI patterns (navigation, pricing tables, testimonial carousels), which reduces build time significantly.

    Pricing

    Plan Price What’s Included Best For
    Free $0 Framer subdomain, 100 CMS items, basic features Testing, prototyping
    Mini $10/month (annual) Custom domain, 100 CMS items, 1 site Personal projects, portfolios
    Basic $15/month (annual) 1,000 CMS items, analytics, staging Small business sites
    Pro $20/month (annual) 10,000 CMS items, password protection, custom code SaaS marketing, content-heavy sites
    Enterprise Custom SLAs, SSO, dedicated support Large teams

    The Mini plan at $10/month is the minimum viable paid tier — custom domain access alone justifies it for any site you’re showing clients or customers. The Pro tier at $20/month is the ceiling for most users; the jump from Basic to Pro is primarily about CMS item limits and password-protected pages.

    No money-back guarantee is published, but Framer allows downgrade and cancellation at any time. Annual billing offers roughly 20% savings vs monthly.

    Try Framer →

    User Experience

    Framer’s canvas-based editor is closest in UX to Figma. If you’ve used Figma, you’ll feel oriented within the first 20 minutes. If you haven’t used design tools before, expect a 3-5 hour learning investment before building productively.

    The onboarding flow is minimal: sign up, choose a blank canvas or template, and you’re in the editor. Templates are good starting points — we found the SaaS template and personal portfolio template both structurally sound, requiring style changes rather than structural rebuilds.

    Performance in the editor is solid. On a 2022 MacBook Pro M2, Framer’s editor handled projects with 30+ pages and 200+ components without perceptible lag. On an older Windows machine (2019, Core i7), we encountered occasional scroll performance issues on the canvas with heavily animated pages — not a blocker, but worth noting.

    Mobile responsiveness requires manual breakpoint configuration — Framer does not auto-reflow desktop layouts to mobile. This is standard for canvas-based builders, but it means mobile design is a separate step from desktop. We spent 20-30% of our build time on mobile layout adjustments.

    Support quality is adequate. Documentation covers most standard use cases. The community Discord is active — we found answers to two non-standard CMS questions via Discord search in under 5 minutes. Email support response times averaged 24 hours in our testing; priority support is available on higher tiers.

    Who Is Framer Best For?

    Buy it (Mini or Pro plan): Designers and design-aware founders building marketing sites, SaaS landing pages, or portfolio sites who care about visual quality and don’t want to write code. If you’ve ever looked at a Webflow site and thought “I want that quality without learning Webflow,” Framer is your answer. Indie hackers launching products on a 2-week timeline will also benefit — Framer’s speed from blank canvas to live site is genuinely fast for experienced users.

    Skip it: Developers who prefer code control and find visual builders slower than coding. Also skip if your primary need is e-commerce (Shopify is the answer), complex data-driven applications (Framer is not an app builder), or high-volume CMS with complex filtering (Webflow’s CMS system is more mature).

    Wait: Non-designers without Figma experience who are considering Framer for a simple 3-page site. You’ll spend significant time learning the editor before building productively. In that scenario, Squarespace or Carrd is a faster path to a live site. Come to Framer when you’re ready to invest in the learning curve.

    Final Verdict

    We built four real sites with Framer over six weeks. The consistent finding: Framer produces better-looking output, faster, than any comparable no-code tool we’ve tested — as long as you’re building marketing sites and not applications.

    The animation system is the decisive feature. No other no-code tool we’ve tested — not Webflow, not Squarespace, not Carrd — lets a non-developer produce scroll animations, hover interactions, and physics-based transitions at the quality Framer delivers. The output looks hand-coded because the system is designed by and for people who understand what hand-coded animations look like.

    At $10-20/month, the pricing is accessible for any solo founder or small team. The free tier is genuinely useful for prototyping before committing. The hosting performance is production-ready.

    The ceiling exists: complex CMS filtering, e-commerce, and app functionality are outside Framer’s scope. But for its defined purpose — beautiful, fast marketing sites — Framer earns a 9.0/10.

    The short version: If you need a marketing site that looks like it was built by a designer and a developer, Framer lets you do it yourself. For any designer, indie hacker, or startup marketer who’s been settling for template-quality sites, this is the upgrade worth making.

    Try Framer →

    More in This Series